Homemade winter fishing rod from a champagne cork. Champagne cork rod video Winter cork rod handle
For every fisherman, the most valuable and irreplaceable thing is, of course, a fishing rod. It is to the fishing rod that a real fisherman treats with special trepidation and some love. A fisherman can choose a fishing rod for an eternity, while carefully examining every detail of the rod.
An important element of any fishing rod is its handle. If the handle is uncomfortable, or not long enough, or vice versa requires shortening, then fishing will not work. After all, comfort and convenience are the main conditions in any business, and fishing is no exception here.
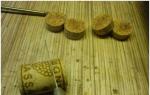
In order not to waste time and energy on choosing a suitable handle, we suggest making it yourself at home. The main material in this will be wooden corks.
Tools that will be useful in the process of making a cork handle for fishing rods, spinning:
- Knife for cutting paper
- Marker
- Drill size 8 mm and drill
- stud with nuts m-8 and needle file
Cork handle manufacturing process:
First you need to cut the wooden plugs into small circles "washers". This is done very easily with a knife.

After that, the resulting "washers" need to be drilled in the very center. To do this, you need a drill and an 8 mm drill bit.

Now you need an M-8 stud and simple nuts. All parts must be assembled - put the resulting "washers" on the stud and fasten with nuts. The resulting "washers" may be uneven, since it is not always possible to get into the very middle, but this is not scary, all the irregularities will be ground off.

Before starting the processing of "washers", it is recommended to pre-glue them and allow the glue to dry. After that, the part must be clamped into the drill and begin processing.

When processing a part with a drill, it is recommended that the drill be securely and tightly fixed on the table - this is for your own convenience. The drill must be processed until a smooth, and most importantly, even handle is obtained.
In the fishing shops of our time, the range of fishing tackle for ice fishing is huge. However, some anglers practice making winter fishing rods of various types with their own hands.
A homemade winter fishing rod is made in the following cases:
- there is no desired model in the store;
- not near a shop, typical for the countryside;
- the habit of doing everything with your own hands at home;
- savings.
We will look at how to make three types of fishing rods in our article:
- for mormyshing;
- for glitter;
- I will put.
remothless
The first homemade winter fishing rod, the manufacture of which we want to consider, is jigging. This is the lightest tackle in terms of weight and the selection of materials for it is not difficult. To make a revolver, we need:
- champagne cork or thick foam;
- plastic knitting needle from an umbrella or other similar rod;
- a set of cambric;
- lavsan or x-ray;
- glue and colored markers.
In the description of the process of making fishing rods, we will mention nods in passing, since this is a separate big topic, and it requires writing a separate article. With regard to the revolver, let's say that for this fishing rod it is easiest to cut it out of Mylar or X-ray film, and assemble the fasteners from cambric of different diameters.

Do-it-yourself winter fishing rod for mormyshing is made in the following sequence:
- We grind the handle of the fishing rod from cork or foam plastic. To do this, we chamfer one side of the cylinder to make it look like a skirt.
- We drill a hole in the cork.
- Glue or firmly insert the whip into it.
- We mount a nod.
- We wind the fishing line and tie the mormyshka.
A note regarding the attachment of the whip to the handle. There are two options at the request of the angler:
- at the end of the cork;
- side of the cylinder.
In the second case, it is possible to drop the turns of the fishing line, which helps when playing a large trophy.
For nozzle mormyshka
In the attachment version of jig fishing, a home-made fishing rod of a more voluminous design is used. Its handle is cut out of foam, cork or wood in the form of a bracket, this form is called a “filly” in the fishing environment. A groove is cut in it for winding the fishing line, getting a kind of reel. A hole for the whip is drilled in the front end.

A whip for a winter fishing rod of this type is bought in a store or they use knees from broken fishing rods, or they simply cut a branch from a tree, as they did in the old days. A nod is also made from improvised materials:
- metal spring;
- lavsan or x-ray film;
- from a plastic bottle.
The nod holder is constructed from cambric or high-voltage automotive cable.
Universal postavush
We called this type of rod universal, because its use is diverse. Based on this design, you can assemble tackle for such types of winter fishing as:
- float;
- for flow;
- for light shine;
- live bait fishing for perch;
- put on rotan or pike perch.
To make a universal winter rod, you can use different materials, but we will consider one of the options with a mention of the possibilities for expanding the range.

The material for the handle of such a rod can be a simple plastic tube with a diameter of 15 millimeters. The manufacturing process in this case can be described in the following steps:
- Cut off a piece of 15 centimeters from the tube.
- At the front end we attach a coil or two wire staples as a reel.
- We insulate the handle by gluing cork, polystyrene or synthetic isolon on it with the non-foil side out.
- We plug the ends of the tube with plugs, we first put a weight in the fishing rod for the current to resist tipping over.
- In the cork of the front of the tube, we drill a hole for the whip.
- We insert a whip, its options are described in the previous part of the article.
- We make legs, they can be made from wire, a piece of plastic and so on.
- If necessary, we equip the fishing rod with a nod or access rings.
Spinner for lure
This type of winter fishing rod is similar to the universal fishing rod in terms of manufacturing method, but its production requires a more careful approach due to the greater responsibility of the tackle when using baits in fishing for large fish. Therefore, we will describe the process in more detail, revealing some of the nuances.

Let's start with the manufacture of the handle. It can be made from the same plastic tube, umbrella handle, garden sprayer or something similar.
Let's use a cork for this. The process of warming the handle looks like this:
- Chop the cork with a rasp or grater into small pieces.
- We coat the tube along the length of the future handle with glue, skip the place under the coil.
- We roll it on a crumb.
- We wait for complete drying and again spread and roll.
- Upon reaching the required thickness of the handle, we process it first with a rasp, then with a file and skins of different grain sizes.
At the end of the creation of the handle, we attach the coil. To do this, we mount a reel seat of two clamps to the tube, between which we clamp the legs. From above we wind up an insulating tape to exclude contact of hands with cold metal.

It is impossible to make a coil with your own hands at home, so you need to purchase one of the options in the store:
- plastic inertia;
- "meat grinder" with a small spool;
- small multiplier.
We close the ends of our handle with corks, in the front we make a mounting hole for the whip, where we insert it, its length should be 60-70 centimeters.
Now you need to attach access rings to the whip, there should be at least three of them. We mount the tulip on the tip, distribute the rest along the length of the form. For fastening we use glue, threads and fishing varnish.
We finish making a lure fishing rod by strengthening the nod, if it is required, many fishermen do without this element of tackle.
Source: lovlyavsem.ru
How to make a winter fishing rod with your own hands at home
You can make your own gear for fishing in the winter without any problems. The main thing is to listen to the opinion of experienced anglers. Today we will tell you how and from what the two most popular types of winter fishing rods are made:
- for mormyshing;
- for glitter.
Before we start, let's get into the theory - find out what, as standard, both rods consist of. And then we will listen to the opinions of experts in this matter.
What is a winter fishing rod made of
Both options, a fishing rod for jigging and a fishing rod for fishing with bulk lures, are somewhat similar, but at the same time there are slight differences between them.
A winter fishing rod for mormyshka fishing most often consists of the following components: a reel or reel (both options serve as a handle), a six and a nod. There may be additions, but the classic version is just that.

In the photo: an example of a classic winter balalaika fishing rod.
A winter rod for fishing with bulky baits is equipped with various “ingredients”, the set of which depends on the method of fishing: fishing with light or heavy lures.
In the first case, the fishing rod consists of a fishing rod, which acts as a handle, reel, whip and nod. Moreover, if you use a flexible whip, you can not use a nod.

In the photo: an example of a classic winter fishing rod, filly.
In the second case, when you went fishing with heavy lures, you will need a serious, durable tackle, which, during animation, imposes higher requirements on strength and rigidity than tackle for jigging. Such fishing rods are completed with a short blank, with several throughput rings, including a tulip, a handle on which either a spinning or multiplier reel is attached.

In the photo: an example of a winter fishing rod with an inertial reel.
So, we briefly learned what two variants of fishing rods in an average configuration consist of. Now let's talk with experts who have made dozens of winter fishing rods on their own, both for mormyshka fishing and for lure.
Nikita (ndup):
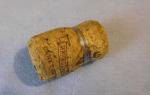
- Good afternoon, dear friends, today I will tell you how to make a couple of types of fishing rods with your own hands. The simplest and most effective fishing rod that you can make in a short period of time with your own hands is the so-called Shcherbakov's fishing rod. It is done very simply! After the New Year's table, a cork from wine or champagne remains (made of cork material, not plastic!), Carefully grind the place under the fishing line and glue the six on super glue. The main thing is that the six is amortized, and when biting, the fishing line from the cork begins to bleed, that is, some analogue of the friction clutch is obtained.

In the photo: a homemade cork fishing rod.
The advantage of such a fishing rod is the ease of manufacture, and it does not take up much space. Another big plus is the light weight of this design. The downside is that the fishing line is wound by hand, this fishing rod does not have any spools ...
Another simple and easy-to-make fishing rod is a filly. You can catch it not only using a mormyshka, but also on a lure.

In the photo: a homemade foam rod.
It is also done simply, we take a piece of foam or cork material, we grind the place under the fishing line. We drill a hole into which we insert a six-piece about 20-30 cm long and that's it. The fishing line on this design is also wound by hand, there are no spools.
You can also watch a video where I finalized a nod for a winter fishing rod with my own hands.
Igor (IVH):
- Every angler, whether a beginner or an experienced one, does not matter, over time, after a shopping trip, a certain amount of lures accumulate - spinners, balancers and many other fishing goodies. It is no secret that a huge number of winter fishing enthusiasts hunt predatory fish - perch, pike perch, pike, burbot. But the bait, of course, is different for each predator - they differ in size, weight and other parameters.

How to adapt to these different baits? Someone purposefully catches a perch, and someone likes only winter fishing rods for a balancer. That is, you have to have in the box a whole bunch of various baubles with varying degrees of hardness and long whips? And if in this place all these types of fish are present?
Alternatively, you can get by with store-bought lures, of which there is now an abundance of assortment, but in my opinion it is better than my own, made by myself - no! It meets all the necessary parameters of a fisherman - weight, length, stiffness of the whip, or vice versa softness. Here everyone chooses for himself. In shop fishing rods, these parameters may not match. Therefore, at one time I was also puzzled by this question - what the shops offered did not fit my fishing conditions. It just didn’t fit in my hand - and I didn’t want to feel discomfort while fishing. After all the thought, I came to an unequivocal decision - it's time to start making a fishing rod for your needs.
After many years of experience in the manufacture of such gear, I can say that there are a great many options. However, they all differ only in nuances.
In general, there are two types of fishing rods - with a reel and without a reel. The second option is the simplest - a variety of fillies, pistols and handles of any shape made of lightweight material, for example, made of foamed PVC. For example, I made from foam, pine bark and other unusual materials. Such rods are the lightest and most weightless. But one inconvenience for such fishing rods is that you have to wind the line with your hands. When moving from hole to hole, the whole thing gets confused ... You spend time unwinding, you get nervous ... Is it really necessary for fishing?

That is why I consider a fishing rod with a reel to be the best option for perch fishing in winter. Fishing line for winter fishing is quickly etched and reeled up. A homemade fishing rod with a reel can be made from anything. But the best option, in my opinion, is a cork handle from an old spinning rod with a reel seat. It is simply cut to the desired length and muffled from the end.
Whips can be made interchangeable for your fishing conditions, for all occasions and any fish. From the most powerful to the most delicate, for example, perch. For pike and zander, fiberglass rods from old telescopic rods are best suited. Modern shop whips, in my opinion, are a bit soft. Carbon fiber can also be used on perch. Do you make a fishing rod for walleye? I don't recommend carbon fiber. I broke a couple of whips and abandoned this material.
Another version of the fishing rod can be made from an ordinary balalaika by replacing the standard vinyl whip with a flexible carbon fiber one, and attaching a spinning ring to the end. A nod is not needed here - the tackle is so delicate that the bite of even a small perch will be visible. In the photo is my standard set of homemade baubles. I made it a long time ago and still use it. They lie perfectly in the hand, the weight is small, the hand does not get tired, the bait animates without problems. Such homemade fishing rods, again, in my opinion, are very sensitive. Each knock on underwater snags or stones is transferred to the hand.

Whips are easy to change. You can either pull it out or put it in.
And in the end, I’ll reveal a little secret - in order to know the depth in each hole, it is not necessary to use a depth gauge or echo sounder - on the line of the reel, risks are made every meter with a permanent black marker - you bleed the line and see how many meters under the ice.
Sergey (buterat):
- I came to this question in the same way as to all other homemade products - in the evening before fishing, where I had to catch perch on light baubles (a new way for me), I studied materiel on YouTube and came across a video about a nodding fishing rod. Naturally, I had a desire to do it myself. And immediately! By that time, all the stores were closed, so I had to make do with what was available. Fortunately, such a fishing rod turned out to have not so many details: a reel for winding fishing line and a hollow whip. It is this “recipe” that I want to describe to you.

I dug up a small foam plastic balalaika in my fishing locker - it will be warm, convenient and quickly change the length of the fishing line, since I like to run after active fish, and not sit in one place, and light weight is one of the most important parameters of a nodding fishing rod. The issue with the hollow whip was also resolved quickly - the float rod, thin and flexible, went into consumption.
We remove the native whip from the balalaika and drill a hole in the body so that the fishing line along the new hollow whip enters the reel without kinks in a straight line - this way the fishing line will be less injured on the edge of the body or whip. In addition, this way the fishing rod lies more comfortably in the hand, a la the handle of a pistol.
We glue the whip into the body of the coil with glue, I used the “crystal moment” - it is transparent and does not grab instantly, which allows you to set the whip evenly without deviations. After the glue has set, I advise you to process the end of the whip inside with a round file - this will slightly smooth out its sharp edges and prevent you from cutting the fishing line and losing your favorite spinner.
The last thing I did was put a piece of bright heat shrink on the tip of the rod, since carbon is fibrous and can delaminate, and the tube will prevent this.
That's all, it remains to wind the fishing line, prepare lure for winter fishing, sharpen mormyshki for roach, for example, and into battle.
Such a rod is easy to manufacture, light in weight and very sensitive - you will not miss a single, even the slightest change in the game of your micro-lure, and there is nothing to say about the bite.
By the way, after fishing with similar baubles, I came to nodding rods in no-bait fishing, but that's another story ...
Alexander (skaz):
— You know, I pretty quickly came to the conclusion that it makes no sense to make fishing rods. But alteration or adjustment is much easier both in terms of labor costs and time. Personally, my opinion is that for people who are engaged professionally, it probably makes sense to do all this, develop from scratch, invent, achieve some special characteristics in the gear they make. But for the general mass of anglers - it makes no sense. But again, this is my opinion, which concerns mostly rods for vertical lure of pike perch. By the way, in my opinion, the most successful fishing rod for perch spinners is the “Petersburg”, which is made in the form of a pistol grip. If you describe my revision, then it is as simple as possible. First, you choose the lightest rod in terms of weight. You look at what the whip is made of and what it is, either you change it or shorten it, depending on the requirements for stiffness. You mount a tulip, a couple of access rings. And you have in your hands a cheap and reliable tool for winter fishing.
Video: Making a simple do-it-yourself winter fishing rod
We offer you one of the above options for making a winter fishing rod with your own hands. We will make it from an ordinary champagne cork.
From an ordinary balalaika, you can make the most convenient and comfortable tackle, which is a pleasure to fish. The other day we filmed another series of our video blog, in which Alexander Serykh (CCM in fishing) shared his secrets for finalizing balalaikas.
Friends, we hope that the advice of our users will help you not only in finalizing, but also in creating your first winter fishing rod from scratch. If you have your own "cooking recipes", then feel free to share them in the comments.
Source: www.fishingsib.ru
Materials for creating winter fishing rods
The main elements of tackle for ice fishing are the handle and the whip. They can be made from different materials. Before you make a winter fishing rod at home, you should choose the most suitable options for yourself.
What is the whip made of?
The whip has a serious responsibility for the quality of the wiring and the effectiveness of the strike. Therefore, this homemade element must be optimal in length and rigidity. Manufacturers of budget fishing products usually use materials such as polypropylene or polystyrene. They quickly deform or break.
- A good polymer for making a whip is fiberglass. It is suitable for most types of winter fishing rods.
- When you want to break through the hard mouth of a pike or walleye, it is better to use a carbon fiber whip.
- Juniper has long been a traditional material for the manufacture of a whip. Even now, some anglers successfully use it on their fishing rods.
As for the length of the whip, for jig tackle it is limited to 20-30 cm, lure use longer elements (50-70 cm).
Handle materials
One of the main requirements for the handle is convenience, lightness and comfort. But it must be hard enough to securely fasten the whip.
- Our grandfathers made pens mainly from wood. It is pleasant to hold even with a bare hand, it is well processed and durable.
- Today, wood has been replaced by such modern materials as cork, dense foam, polystyrene foam. They have lightness and buoyancy, are well processed, do not freeze over.
The best homemade products for winter fishing, manufacturing examples
A lot of homemade products have been invented, which differ in the complexity of manufacturing, weight, and cost. Every fan of ice fishing wants their own ice fishing gear to be simple, affordable and effective. Therefore, we will dwell on several options that any angler can implement.
Create a rewinder for 10-15 minutes
The use of such non-attached mormyshkas as “devil”, goat”, “uralka” or “nymph” allows you to catch roach, bream or perch without planting a small bloodworm in the cold. But to give these lures a believable action, a light and sensitive rod is required. It can be done in 10-15 minutes if you prepare all the necessary details in advance.
- A small pen is easy to make from a champagne cork or a piece of Styrofoam, giving it the desired shape. The handle will also serve as a kind of reel for storing a supply of fishing line.
It is necessary to make a small groove on the handle so that the fishing line does not fly off the rod on its own. This can be done with a clerical knife and sandpaper.
Source: fishelovka.com
Fishing for bloodworms and mormyshka
The most common purchased fishing rod options are - balalaika And filly. Options for independent products - imitation of a balalaika and a filly, as well as numerous options for known and unknown handmade designs.
Winter fishing rod with a handle - cork or foam line storage

The rod consists of the following elements:
- Pen- timber storage from cork or polystyrene.
Made from champagne cork
- a channel for storing fishing line is cut in the cork with a knife at a distance of 1/2 cm from the edge, ½ cm deep and wide;
- on the other side of the cork, a transverse hole for the whip is drilled. The hole diameter must be 10% smaller than the maximum whip diameter.
- whip.
Whip length 30-50 cm. It must be flexible and durable.
Use:
- the knee of an old fishing rod or spinning rod, cut to length if necessary;
- plastic knitting needle;
- processed juniper branch;
- rings should be installed on the whip every 10-15 cm to eliminate sagging fishing line. You can use ready-made purchased rod rings or rings from an old rod.
You can make your own rings from ferrous wire 0.6-1 mm:
- wind the wire on any cylindrical object of a suitable diameter for two turns;
- bend the ends of the wire perpendicular to the plane of the ring in opposite directions;
- cut off excess wire with scissors for metal, leaving 1-2 cm at both ends;
- screw the rings to the whip with thin, harsh threads turn to turn;
- coat the joints with waterproof glue.
- Nod.
The nod should provide an attractive bait play.
Improvised materials for making a nod:
- PETT container for drinks;
- polyethylene canister;
- old fluorographic picture;
- clock spring.
Manufacturing process:
- A conical strip is cut out with the following parameters: length 10-14 cm, narrow part 2-3 mm, wide part 4-5 mm.
- Rings for passing fishing line (2-3 pieces) are easiest to do this way:
- attach a ballpoint pen or a piece of wire of the required diameter to the nod blank in the right place;
- put on top a cambric from a heat-shrinkable tube of a suitable diameter (cambric length 2-6 mm);
- warm up the cambric carefully. The cambric will tightly cover the nod and the rod on top of the nod;
- pull out the rod.
- To pass the fishing line instead of cambric at the end of the nod, it is better to make a hole at a distance of 3-5 mm from the edge.
- Attaching a nod to a whip. The nod is attached to the whip with a wide end.
- a silicone tube 3-4 cm long is tightly put on the end of the whip. A flattened segment of the rod from a ballpoint pen 3-4 cm is glued to the bottom of the tube to pass the fishing line. The tube is lubricated with petroleum jelly or silicone ointment. The nod is attached from below to the rod;
- a silicone tube of a larger diameter is tightly put on top.
The nod can be moved between the tubes back and forth by adjusting the length of the nod and the stiffness of the guard.
Making a winter rod with a cork or foam handle takes one hour and is estimated at 0 rubles, it can be easily used in sport fishing.
How to catch
- Screw 20 m of fishing line 0.08-0.12 mm onto the cork gutter.
- Pass the line through the rings on the whip.
- Pass the fishing line into the flattened tube (ballpoint pen) on the nod.
- Pass the line through the rings on the nod.
- Tie a mormyshka (or a hook with a nozzle).
- Gradually removing the fishing line from the cork forest storage, lower the mormyshka to the very bottom of the reservoir.
- Hit the bottom of the pond with a mormyshka a couple of times.
- Gradually winding the fishing line on the cork storage area, play with the bait, waiting for a bite.
- In case of a bite, hook the fish with a rod.
- Put the rod aside, fingering the line to pull the fish out onto the ice.
- Take the fish off the hook.
- Wind the line around the cork.
Fishing rod type "filly" with a wooden handle

"Fire" can be used for both mormyshing and float fishing.
- We saw off a piece of 14-16 cm from the wooden handle of an old unnecessary mop. This will be the handle of the fishing rod.
- Line storage device.
- wooden cylinders 2 pcs. 3-5 cm high with a hole for screws drilled in the center of the circle (you can use the wooden handle of a children's net). At 1 cm from the edge of the cylinder, make a recess 2 cm wide with a knife for storing fishing line;
- standard wooden spool for thread with a sawn-off side (the height of the spool without one side is 3.5 cm) 2 pcs.
Screw 2 coils or 2 cylinders on the edges of the handle with screws.
- Drill a hole in the handle in the center of the circle for a whip with a depth of 6 - 8 cm with a diameter equal to the maximum diameter of the whip.
- Fill the hole for the whip with epoxy. Insert whip 21-28 cm (knee from an old telescopic rod). The whip must be strong and have rings for threading the line. Remove excess resin with a cloth.
- To prevent wetting and icing of wooden parts, they can be covered with stain and pierced, or painted over with facade paint for wood.
- To use the filly for mormyshing, a nod is strengthened on the whip in the same way as in paragraph 4 from the “Nod” section.
With an open reel for spinning, mormyshing, float fishing
In a real balalaika, the inertial reel with a stopper is recessed into the round handle of the fishing rod. It is problematic to make such a coil at home on your own.
You can glue a used line spool to the rod handle, but then you have to manually wind the line onto the spool.
You can use a purchased inertial coil, but the manufacturing process will become much more complicated - you will have to cut a round hole in a round handle, come up with a reliable way to mount the coil inside the handle hole.
Much it is easier to use an inexpensive purchased inertial coil(from 30 rubles) and fasten it to the rod handle with insulation or by drilling two holes in the reel holder, fasten it with screws on the handle.
With wooden handle and open inertial coil

- A piece 20-22 cm long is sawn off from the wooden handle of an old unnecessary mop.
- Cork chips are mixed with waterproof glue and gradually, layer by layer, applied to the handle at the grip point (10-12 cm). You can create a comfortable shape of the handle according to the request of the angler.
- After the glue has dried, the handle is sanded with fine sandpaper (you can cover the handle with yacht varnish).
- In the center of the wooden handle, from the side of the whip attachment, a longitudinal hole is drilled to a depth of 6-8 cm with a diameter equal to the diameter of the thick end of the whip.
- The resulting hole is gradually filled with epoxy.
- Insert a whip from an unnecessary telescopic rod 40-70 cm long. Carefully center the whip in place.
- Carefully remove the exposed resin.
- After the resin has hardened, the place where the whip is fixed in the handle is sanded with fine sandpaper to remove bumps and sagging of the resin.
- A purchased inertial coil with a brake is screwed to the handle.
Such a fishing rod can be used with a nod for mormyshing. It can also be used for float fishing and for lure. In these cases, the nod is not used.
Pistol

Winter fishing rod with pistol grip used for flashing on the current and in stagnant water. Since the structure is subjected to heavy load during the attack of a predatory fish, its handle can be made of a solid material - wood.
- The required shape of the handle in the form of a pistol is cut from a block of wood.
- The final rough shape of the handle and line holder is cut with a knife.
- The forest storage is located on top of the pistol and has an arbitrary appearance. The main thing is that it is convenient to wind the fishing line on the forest storage.
- The final shape is given by sanding the surface with fine sandpaper.
- The handle is treated with stain and covered with deck varnish.
- A hole for a whip is drilled in the horizontal branch of the handle (the whip must be strong and flexible. A spinning tip with a test of 10–30 will do).
- A waterproof adhesive is applied to the whip at the junction with the handle. The whip is inserted into the hole.
When catching a predator with a fishing rod of this design, the hand experiences less stress when jerking a heavy fish. Often winter fishing rods are equipped with a hand loop made of strong rope so that the pike does not pull out a light rod. For a pistol, the need for a rope loop is eliminated.
Materials suitable for winter rod handle
Lightweight material is suitable for mormyshka and float fishing, since it is supposed to catch peaceful fish and the handle will not experience strong jerky loads, but the angler's hands can “fall off” if for several hours in a row in the cold you have to pull a heavy fishing rod all the time.
- cork;
- dense foam;
- foamed pvc.
These materials are not suitable for glittering. You need a strong material that will not collapse under heavy load.
Such material should have low thermal conductivity so that hands do not freeze. It is desirable that the weight of the material is not too large.
Naturally, it is a tree.
There is another option for making handles - epoxy resin.
Cured epoxy:
- slightly inferior to wood in strength;
- lighter than wood;
- thermal conductivity is lower than that of wood.
At the same time, you can make any complex and fancy shape for pouring handles. It can be used for all types of winter fishing.
Pouring handles of any shape from epoxy resin:
- In a semi-hardened gypsum mortar, various objects can gradually create any complex impression. You can immediately immerse up to half the whip in a semi-hardened gypsum mortar.
- Epoxy resin is poured into the hardened gypsum mortar.
- Another portion of the gypsum mortar is poured into another container. In a semi-hardened gypsum mortar in this container, an impression is made for the second half of the product - a mirror image of the first half.
- After the epoxy resin hardens, the planes of the two halves are smeared with epoxy and connected.
Thus, you can pour all the handles listed above, including the balalaika. The handles of the filly and the pistol can be poured immediately along with the timber storage.
Autohook
Postavushki and zherlitsy are not fishing rods. There are anglers who basically do not use devices for passive fishing. However, even such anglers during a good bite sometimes want to use an automatic mechanical tool to take a break. But a fishing rod without a special device will not hook the fish itself.
Simple design for auto hooking shown in the drawing and consists of:
- Rectangular platform 10x20 cm for attaching a winter fishing rod of any shape. A simple option is to attach the fishing rod handle to the platform with plastic ties with clamps.
- On the reverse side of the platform in the middle, nails are driven in and bent to form brackets for the pipe and for the springs.
- A frame fixed permanently on the base with an upper crossbar made of a tube.
- Two springs with rings.

Operating principle:
The rod is placed on the platform and fastened with ties. Springs are put on hooks with rings. It is important that the platform is in a horizontal position. When biting, the platform tilts, the ring of the first spring flies off the hook, the edge of the platform rises sharply along with the fishing rod, and the fish is caught.
In the fishing shops of our time, the range of fishing tackle for ice fishing is huge. However, some anglers practice making winter fishing rods of various types with their own hands.
A homemade winter fishing rod is made in the following cases:
- there is no desired model in the store;
- not near a shop, typical for the countryside;
- the habit of doing everything with your own hands at home;
- savings.
The manufacture of most gear for winter fishing does not require the use of any rare materials, everything you need is in the arsenal of any DIYer.
We will look at how to make three types of fishing rods in our article:
- for mormyshing;
- for glitter;
- I will put.
remothless

The first homemade winter fishing rod, the manufacture of which we want to consider, is jigging. This is the lightest tackle in terms of weight and the selection of materials for it is not difficult. To make a revolver, we need:
- champagne cork or thick foam;
- plastic knitting needle from an umbrella or other similar rod;
- a set of cambric;
- lavsan or x-ray;
- glue and colored markers.
In the description of the process of making fishing rods, we will mention nods in passing, since this is a separate big topic, and it requires writing a separate article. With regard to the revolver, let's say that for this fishing rod it is easiest to cut it out of Mylar or X-ray film, and assemble the fasteners from cambric of different diameters.

Do-it-yourself winter fishing rod for mormyshing is made in the following sequence:
- We grind the handle of the fishing rod from cork or foam plastic. To do this, we chamfer one side of the cylinder to make it look like a skirt.
- We drill a hole in the cork.
- Glue or firmly insert the whip into it.
- We mount a nod.
- We wind the fishing line and.
A note regarding the attachment of the whip to the handle. There are two options at the request of the angler:
- at the end of the cork;
- side of the cylinder.
In the second case, it is possible to drop the turns of the fishing line, which helps when playing a large trophy.
For nozzle mormyshka
In the attachment version of jig fishing, a home-made fishing rod of a more voluminous design is used. Its handle is cut out of foam, cork or wood in the form of a bracket, this form is called a “filly” in the fishing environment. A groove is cut in it for winding the fishing line, getting a kind of reel. A hole for the whip is drilled in the front end.

A whip for a winter fishing rod of this type is bought in a store or they use knees from broken fishing rods, or they simply cut a branch from a tree, as they did in the old days. A nod is also made from improvised materials:
- metal spring;
- lavsan or x-ray film;
- from a plastic bottle.
The nod holder is constructed from cambric or high-voltage automotive cable.
Universal postavush
We called this type of rod universal, because its use is diverse. Based on this design, you can assemble tackle for such types of winter fishing as:
- float;
- for flow;
- for light shine;
- live bait fishing for perch;
- put on rotan or pike perch.
To make it universal, you can use different materials, but we will consider one of the options with a mention of the possibilities for expanding the range.

The material for the handle of such a rod can be a simple plastic tube with a diameter of 15 millimeters. The manufacturing process in this case can be described in the following steps:
- Cut off a piece of 15 centimeters from the tube.
- At the front end we attach a coil or two wire staples as a reel.
- We insulate the handle by gluing cork, polystyrene or synthetic isolon on it with the non-foil side out.
- We plug the ends of the tube with plugs, we first put a weight in the fishing rod for the current to resist tipping over.
- In the cork of the front of the tube, we drill a hole for the whip.
- We insert a whip, its options are described in the previous part of the article.
- We make legs, they can be made from wire, a piece of plastic and so on.
- If necessary, we equip the fishing rod with a nod or access rings.
Spinner for lure
This type of winter fishing rod is similar to the universal fishing rod in terms of manufacturing method, but its production requires a more careful approach due to the greater responsibility of the tackle when using baits in fishing for large fish. Therefore, we will describe the process in more detail, revealing some of the nuances.

Let's start with the manufacture of the handle. It can be made from the same plastic tube, umbrella handle, garden sprayer or something similar.
It is important for us to make it comfortable and warm.
Let's use a cork for this. The process of warming the handle looks like this:
- Chop the cork with a rasp or grater into small pieces.
- We coat the tube along the length of the future handle with glue, skip the place under the coil.
- We roll it on a crumb.
- We wait for complete drying and again spread and roll.
- Upon reaching the required thickness of the handle, we process it first with a rasp, then with a file and skins of different grain sizes.
At the end of the creation of the handle, we attach the coil. To do this, we mount a reel seat of two clamps to the tube, between which we clamp the legs. From above we wind up an insulating tape to exclude contact of hands with cold metal.

It is impossible to make a coil with your own hands at home, so you need to purchase one of the options in the store:
- plastic inertia;
- "meat grinder" with a small spool;
- small multiplier.
We close the ends of our handle with corks, in the front we make a mounting hole for the whip, where we insert it, its length should be 60-70 centimeters.
Now you need to attach access rings to the whip, there should be at least three of them. We mount the tulip on the tip, distribute the rest along the length of the form. For fastening we use glue, threads and fishing varnish.
We finish making a lure fishing rod by strengthening the nod, if it is required, many fishermen do without this element of tackle.
Self-hooking

Another type of winter fishing rod is a self-hooking rod. This is a kind of postavush, designed to respond to the smallest pulls of fish, which for some reason may not be noticed by the angler.
There are several designs of self-cutting gear, we will describe in detail one of them.

It is not difficult to make such tackle for winter fishing. It is enough to have a piece of wood, plywood or chipboard for the base, a few screws and two types of wire: thin for making springs and thick for levers.
- To begin with, we cut out the base in the form of a rectangle with sides of 10 by 25 centimeters.
- We draw a design diagram on it.
- We fasten at one end the brackets for attaching the lever.
- On a thick wire we wind a thin coil to coil to create a spring.
- We bend a thick wire in the form of a lever of the desired shape.
- We fasten the lever with the spring to the base.
- We bend the locking bracket from thick wire.
- We strengthen it in front of the base.
- At the end of the locking bracket, we strengthen the elastic band, fixing it for clarity with multi-colored electrical tape.
- We mount the coil and suspension for the chandelier to the base.
- We wind the fishing line and pass it under the suspension bracket and along the top of the locking bracket.
The actuation tension is adjusted by mutual adjustment of the spring-loaded lever and the locking bracket.

When pulling the fish by the hook, the fishing line presses on the locking bracket, forcing it to move forward and release the hook lever.
Independent production of a new handle for a spinning rod
More precisely, not spinning, but casting, but it doesn’t matter ...
I had to make the handle myself because the St.Croix PM70HF2 casting rod was too long for me. It was decided to shorten it from 2.10m. up to 1.95m. and at the same time slightly change the proportions of the handle - shorten the reargrip (rear part of the handle) while leaving the length of the foregrip (front part) the same.
Since this stick is a two-piece, all work was done with only one knee, I did not remove the access ring, because. I decided for simplicity to do the installation "from the ass" - this is not right, but to fool around with the ring at all I didn’t want to .... I didn’t bother with the careful removal of the original cork handle and reel seat, fearing that in the absence of a special tool and skills I could damage the blank. I just took and cut off the cork from the form, first with a knife, then I cleaned up the influx of glue and sanded it to graphite.
I suffered with the reel seat - it was not possible to make a drill-crown, so I just sawed it in several places with a hacksaw and removed it. You need to do this EXTREMELY CAREFULLY, you can easily cut the form!
I measured everything again and sawed off an "extra" piece from the form.
Here's what I got.
Blank sanded with fine sandpaper (P-600)

Having counted the required number of cork rings and measured the diameter of the blank at the place where the reel seat was attached, I went to the store and bought everything I needed - two types of rings (cork and rubber cork (burls)), 5-minute "Flex coat" epoxy glue, Fuji reel seat, along the way I jumped into the construction market and bought a F6mm stud, two bearings, a dozen nuts and self-tapping screws, a thick reel of masking tape and round skins of different grain sizes.
Before assembly, we estimate how it will look

The foregrip and part of the reel seat clearly hit the branded decal - I had to clean everything off. Now the stick will be "no name" for now...

To assemble the handle, I needed a piece of hairpin of the appropriate length.
I didn’t bother with perfect evenness - it’s “by eye” smooth and okay ...
In order for the cork not to stick to the stud, it (the stud) must be wrapped with masking tape. I wound the adhesive tape not across, but putting the hairpin on a piece of the desired length, wrapped it along - so evenly.

Diluted epoxy adhesive "Flex coat" in a ratio of 1X1. You can also use our epoxy, but I "divorced" to a branded one ...
Having put a nut and a suitable plywood washer on the stud as a limiter (I just got it under my arm), I began to gradually pick up the handle from the cork rings smeared with glue.


So the whole handle gradually gathered up, or rather one of its parts - reargrip (reargrip) - back.

To ensure a snug fit of the rings, I pressed the workpiece with a second plywood washer with a nut. In the same way, on the other hairpin, we collect foregrip (foregrip) - the front part

The blanks were left to dry overnight - the glue, although "five minutes", but complete polymerization - about 16 hours ...
These are the blanks of cork handles.

Now let's start processing blanks.
Of course, I didn’t have a lathe and had to invent it. I took a piece of chipboard (some kind of furniture spare part), a drill with a front handle, two pieces of plywood (10s), furniture corners, 2 bearings, bolts with nuts and self-tapping screws, and in 10 minutes I assembled some kind of lathe. General view of the "machine" in the photo below.

Some explanations for the design: the drill is fixed on the board with the help of a clamp on the front handle - the plastic handle is removed, the bolt is attached from below with a chipboard nut.

Pieces of plywood are screwed to the chipboard using building angles with bolts and nuts. Holes are drilled in plywood slightly smaller than the outer diameter of the bearing. The bearing is pressed against the plywood by self-tapping screws in such a way that the stud fixed in the bearing rotates freely together with its inner part, and the outer part is motionless as it is fixed by these same self-tapping screws. In general, from the pictures you can understand ...

Now it is worth paying attention to the fastening of the stud in the bearings. In general, one of the main and most frequently used "adapt" for me was masking tape. It is with its help that all parts of the handle are centered (by winding), it prevents unwanted gluing of parts, it can quickly mark the relative position of the joined parts, etc. - tape is needed all the time, always keep it on hand.
So, for a tight, play-free fit of the bearing on the stud, you need to wind the required amount of adhesive tape on the stud.

Putting the bearing on the winding,

cut off excess tape and tighten the bearing with nuts and grovers.

Now let's take three types of skin - I used both coarse P-80, medium P-320 and fine P-600.
We turn on the drill and begin to give the cork the desired shape.
It must be remembered that the handle should fit as perfectly as possible with the reel seat, for which during operation we constantly control the diameter with a caliper. You should not bring this diameter right away, it is better to first "approach" it with a coarse sandpaper, and then bring it exactly fine - it will be more accurate.

Particular attention should be paid to places where materials of different properties are connected - ordinary cork and rubber cork (burl), since burl is processed 10 times worse, you can easily cut down a regular cork at the junction ...

When the desired shape of the handle is reached, we take a fine skin and polish it to a smooth, slightly velvety state, comparing small burrs from a larger skin.

When working, quite a lot of cork dust appears, it is convenient to sweep it with a brush, and then collect it in a jar and use it as a filler for putty for repairing cork handles.
So, the reargrip is ready, now we’ll do the foregrip in the same way ...


Now we unscrew the studs from the cork handles, I unscrewed them manually, or you can just clamp the stud into the drill - vzhzhzhiik and that's it ...
Next, the most hemorrhoidal process, in my opinion, is to expand the internal hole in the cork handle to the diameter of the blank. For this purpose, use Examples- conical tubes with abrasive coating. Naturally, I decided to make everything simpler ... I screwed a couple of nuts onto the stud and tightened them at a distance of 6-7 cm from the end of the stud.
With a needle file, he made incisions on the extreme nut with which she was supposed to "gnaw" the cork, the 6 cm end acted as a guide. I clamped the hairpin into the drill, 5 minutes and the hole has already expanded significantly! But I have not just a whip, but a real jerk club - the thickness of the blank at the handle is 1.6 cm!!! How to expand further? I took a washer, tightened it on both sides with nuts, and sawed the butt end with a needle file making "teeth" - it turned out to be a washer-drill, more precisely cutter washer... Be sure to leave the end of the stud (about 10 cm) with the nut - this will guide the entire structure exactly in the center of the handle and will not let the "mill" go sideways.

This is how it all happened...
Well, at the end, I trimmed the inner hole with sandpaper - wound it on the same hairpin and fixed it around the edges with masking tape.
Well, all the necessary parts are available, you can start assembling. Having accurately estimated and calculated everything, we mark the form with adhesive tape - the edge of the adhesive tape is the place where the foregrip will begin. The tape will also protect the form from accidental contact with glue.

Having cut off a strip 1 cm wide from the adhesive tape (it is convenient to do this by cutting the entire reel of adhesive tape in a circle with a designer knife), we make windings under the handle - arbors, they will center the handle relative to the blank. We breed epoxy glue, thickly coat the blank and arbors.
We push the handle onto its seat by slightly rotating, the handle drives a roller of excess glue in front of us - we collect it in a jar. Let dry for 15-20 minutes. We glue the reel seat in the same way - we wind the arbors from adhesive tape along the inner diameter of the reel seat, coat it with glue, push it into place ... We do the same with the back of the handle - riargrip. Now our shortened rod new handle!

The only thing left to do is close the hole in the extreme ring (burl) of the reargrip.

At first I thought to just cut a round piece from the same material and paste it into this hole, but then I decided to show off a little - make a buttcap with my "logo".
Of suitable wood, I had only American walnut. From it I sawed a blank - a cube. Having marked with a pencil and holding it with a clamp, he gave it a cylindrical shape with a file.

I drilled a through hole in the center with a drill, inserted a bolt into the hole and tightened it on the other side with a nut with a Grover.

I inserted this design into a drill and, using an improvised tool (a file, a needle file, a drill, a cone cutter and a skin), I turned it, giving the necessary shape and size.

When the part was ready, I impregnated it with epoxy (hot method for deeper penetration - warmed up the part in the oven and smeared with epoxy) to give strength and resistance to water. I made the logo using the method of "dropping" - I printed the logo on a printer and cut it out with scissors. Cut need Necessarily, because if you just drip epoxy on the printout, the epoxy will definitely spread, and the cut piece of paper keeps the epoxy from spreading.

I sealed a through hole in the buttcap with epoxy and sawdust and then glued it into the kukoyat.

Pasted the logo.

Rod#1 not a "superlative degree", but the serial number of the stick... Buttcap is the only identification mark of this rod, there is no corporate decal, and I did not do my painting on the form.
Thanks to the design of the butt cap, the logo is recessed inward by 2-3mm, which, in theory, should protect its surface from severe scratches. But even if it is scratched - it's not scary, in the end it takes 5 minutes to drip a new one.
Of course, this article will be funny and naive for rodbuilding masters, I know that I did a lot of things wrong and may not be rational, but my main task was to make a stick for myself and, of course, I just wanted try- "hook" or not... Hooked! Now I'm thinking about completely self-assembly of the rod...
In preparation for the work, a lot of time was spent searching for disparate information, I hope my material will be useful to novice road builders and those who simply want to sort out their spin.
And yet - it took me about the same time to write this post as it took me to write all the works described!
The design of a winter fishing rod for fishing without a bait, which is made in a couple of hours from improvised materials, is presented.
The main element of the fishing rod is an axleless reel, which is made from a cork from a plastic bottle. The advantages of axleless reels, especially when fishing without attachments - when fishing is active, over axial ones are undeniable, and if it can be made quickly, then this advantage is doubly. . .
Fishing rod for no bait with cork reel
I want to invite you to have fun and have fun making a simple axleless fishing rod "Fun" from Palych. He came up with it about five years ago and made a lot as working souvenirs for friends.
So, let's get started .... We will need two bottles - one for five liters from under water, and one liter from milk or kefir, juice, etc. The main thing is that the cork of a small bottle is very tight, but enters the neck of a large one.
We saw off the neck of the milk bottle under the large rim, and the large one - under the small one, next to the cork.

We clean and level the planes to the rims and start filing the diameter of a small cork until it enters and rotates in a large bottle with a slight interference.
Now we cut out the bottom of the large lid, but not under “I don’t want it,” but to the inner ledge that “locks” the neck of the flask.

We also carefully cut this rim to the plane of the bottom of the cork. To the end, of course, do not cut off with a knife ... Then it will be necessary to clean it from the inside with sandpaper, since this is one of the planes of the friction pair.

Now you need to shorten the large cover by 5-6 mm and clean the cut with sandpaper

At the inner insert - coils - we will also cut the cork so that 5 mm remains. On the thread of the cover (inside), you need to drop a few drops of glue to finally fix it. In the groove for the fishing line, it is necessary with a file or something else to grind off the thread on the neck of the former bottle. And you can leave it like that - there will be enough space for 15 meters of fishing line 0.12.


I have PVC plastic - light and dense, and not very hard, it is well processed with a knife. From it I make bosses for handles and glue them to the inner walls of the coil. Maybe one. I like it when a couple of pens.

For handles, you can take long screws and put cambric on them. I found rivets for a riveter (sold in building materials). I drill holes in the bosses and insert the coil handles into them (with glue).

I insert foamed propylene into the inside of the coil, or whoever has something - foam, in general. And the snow will not clog and there is a place to stick the mormyshka.

Now I cut out the base of the fishing rod from the same, but 3 mm plastic.

I lubricate the bead of the case with second glue and glue it to the base. Take care of your fingers and smile! Don't take the Fun rod too seriously. Have fun and enjoy your creativity!

Three millimeters to insert a whip will not be enough, and rigidity is still needed. So I cut another plate.
And then another narrow strip, glue them together and drill a hole for the whip. I have a fiberglass whip for 12 rubles. I like.

Now we drill (or pierce) a hole for the passage of the fishing line. If you want to wind the line clockwise, then drill to the right of the whip. And if "against" - then on the left. Make sure that the hole falls on an empty place near the coil, and not in the collar! By the way, I completely forgot! When we open a milk bottle for the first time, a narrow strip of cork remains on the neck. Remove it, cut it in one place and glue it under the upper side of the reel, thereby creating an additional diametrical stop and forming a groove for the fishing line. (See the photo where I insert the foam into the coil).

The body of the fishing rod in a circle can be glued with a thin strip of plastic, you can use cork, foam, foam ... I'll glue it with foamed propylene. Then I cut the friction gasket out of slippery plastic and insert it into the friction brake pressure ring.

I lightly lubricate all the rubbing parts with graphite grease and twist it merrily for a couple of minutes so that everything gets used. It turned out here is such an axisless fishing rod "Fun" from Palych!

Take another look at the details of "Fun":

We jokingly and without straining for a couple of hours created a good fishing rod. And, although she seems to be joking, she catches the most real fish and behaves very well on the ice. One of my acquaintances liked "Zabava" so much that he made two dozen of them of different sizes and calibers. Well, I think it's overkill. You need to have all sorts of fishing rods and constantly try new equipment. What do you wish!
I'm not saying that all parts can be made very accurately, with markings using a caliper and thickness gauge. I will not talk about high-quality cleaning, careful selection of friction pads, polishing, painting, and finally, other tuning!
Whoever wants to, will do it. The fishing rod is worth it, if only because the fishing line does not get tangled in it and does not wind around the axis, because - it, the axis - is not! There are other advantages, (minimum financial costs, for example ....) - make and test on real fishing! Or you can hang it on the carpet and impress your guests with a masterpiece of your skill! In any case - you had a pleasant and fun time!